Why aren’t you shattering people’s minds with your harmonizer?
You know that almost no other common VST has one. So why aren’t you using the uniqueness of Harmor’s harmonizer to blow people’s minds with never-heard-before sounds?
I know what you’re thinking. The harmonizer function sucks!
“It makes everything sound like rotten bananas.”
But guess what? You’re about to find out how much that’s wrong.
Stay with me now, because we’re about to dive into the nitty, gritty details of the almighty harmonizer. You’re about to design your next killer sound!
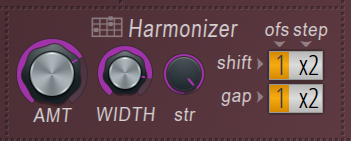
The 5 Essential Parts of the Harmonizer You Need to Know
Are you are following along with me in Harmor? I recommend it. If so, load an empty Harmor patch and change the saw wave to a sine wave.
Don’t know how to make a sine wave in Harmor? No problem! You can download my simple sine wave preset here. Let’s go!
1. Tweaking the Amount Knob (AMT)
You guessed it. The harmonizer harmonizes. I know, it’s a real shocker: that is literally what it does.
But what does that mean?
Harmonizing usually means stacking two or more notes on top of each other to produce a polyphonic sound.
In this context, however, harmonizing has a different meaning. It refers to stacking one or more harmonics on top of each other to produce a thicker sound. Here’s a good article that defines harmonics.
To see what I mean, play a sine wave in Harmor with the AMT knob turned all the way down, and then all of the way up.
I have done this in the image below.

When you turn up the amount knob, additional harmonics are added on top of the sine wave. This is because the harmonizer clones and transposes the existing harmonics in the sound. You can literally see this in the visualization panel.
In this case, there is only one existing harmonic (the sine wave’s fundamental). That’s why it is so easy to see the added harmonics. The harmonizer made four clones of the existing harmonic (seen above).
Take note that the higher frequency harmonics are quieter.
But what if the original waveform had more than one harmonic (for example, a square wave)? In that case, the harmonizer would not just make 4 clones of the fundamental harmonic, but it would also make clones of the other harmonics as well.
The amount knob simply controls the harmonizing mix (how much of the harmonizer is applied to the sound). The higher the amount, the more harmonization is applied.
2. The Width Knob Demystified
The width knob has a confusing name. It does not make the sound wider.
So what does it do? It simply determines “how far upwards the harmonics are cloned.” (FL Studio 20 Manual)
To put it more simply, the width knob controls how many clones are made of the harmonics in your sound. Check out the .gif below.
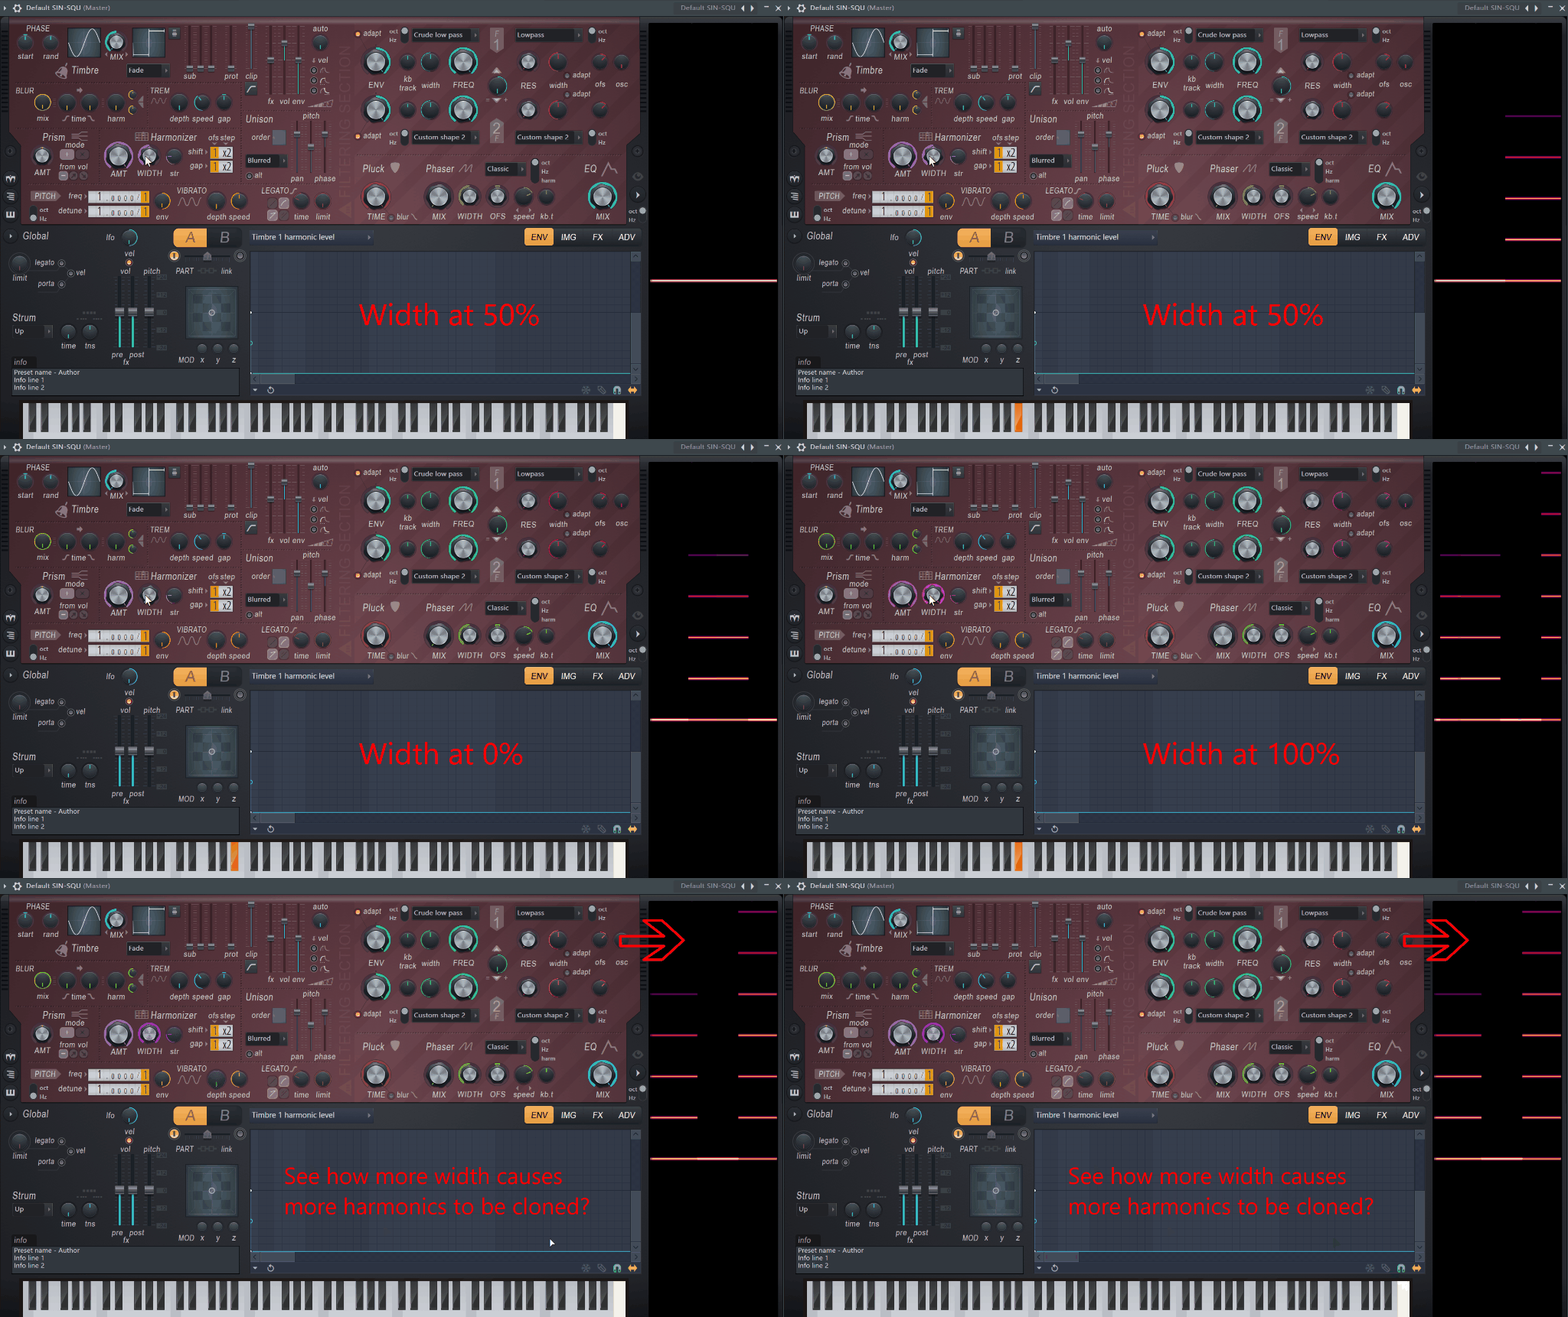
When turned all the way down, no clones are made at all and the harmonizer does nothing. When at 50%, the width knob added 4 visible clones of the original harmonic. When the width knob is at 100%, the harmonizer added even more clones.
3. The Secret of the Strength Knob (str)
You probably have noticed that the higher frequency harmonics made by the harmonizer are quieter than the lower ones. That’s why they aren’t as bright in Harmor’s visualization panel.
But what if you want to change that?
It is really simple. All you have to do is adjust the strength knob.
Essentially, turning up the harmonizer’s strength knob adds emphasis to your upper harmonic clones by increasing their volume. Watch this work in the below .gif image.
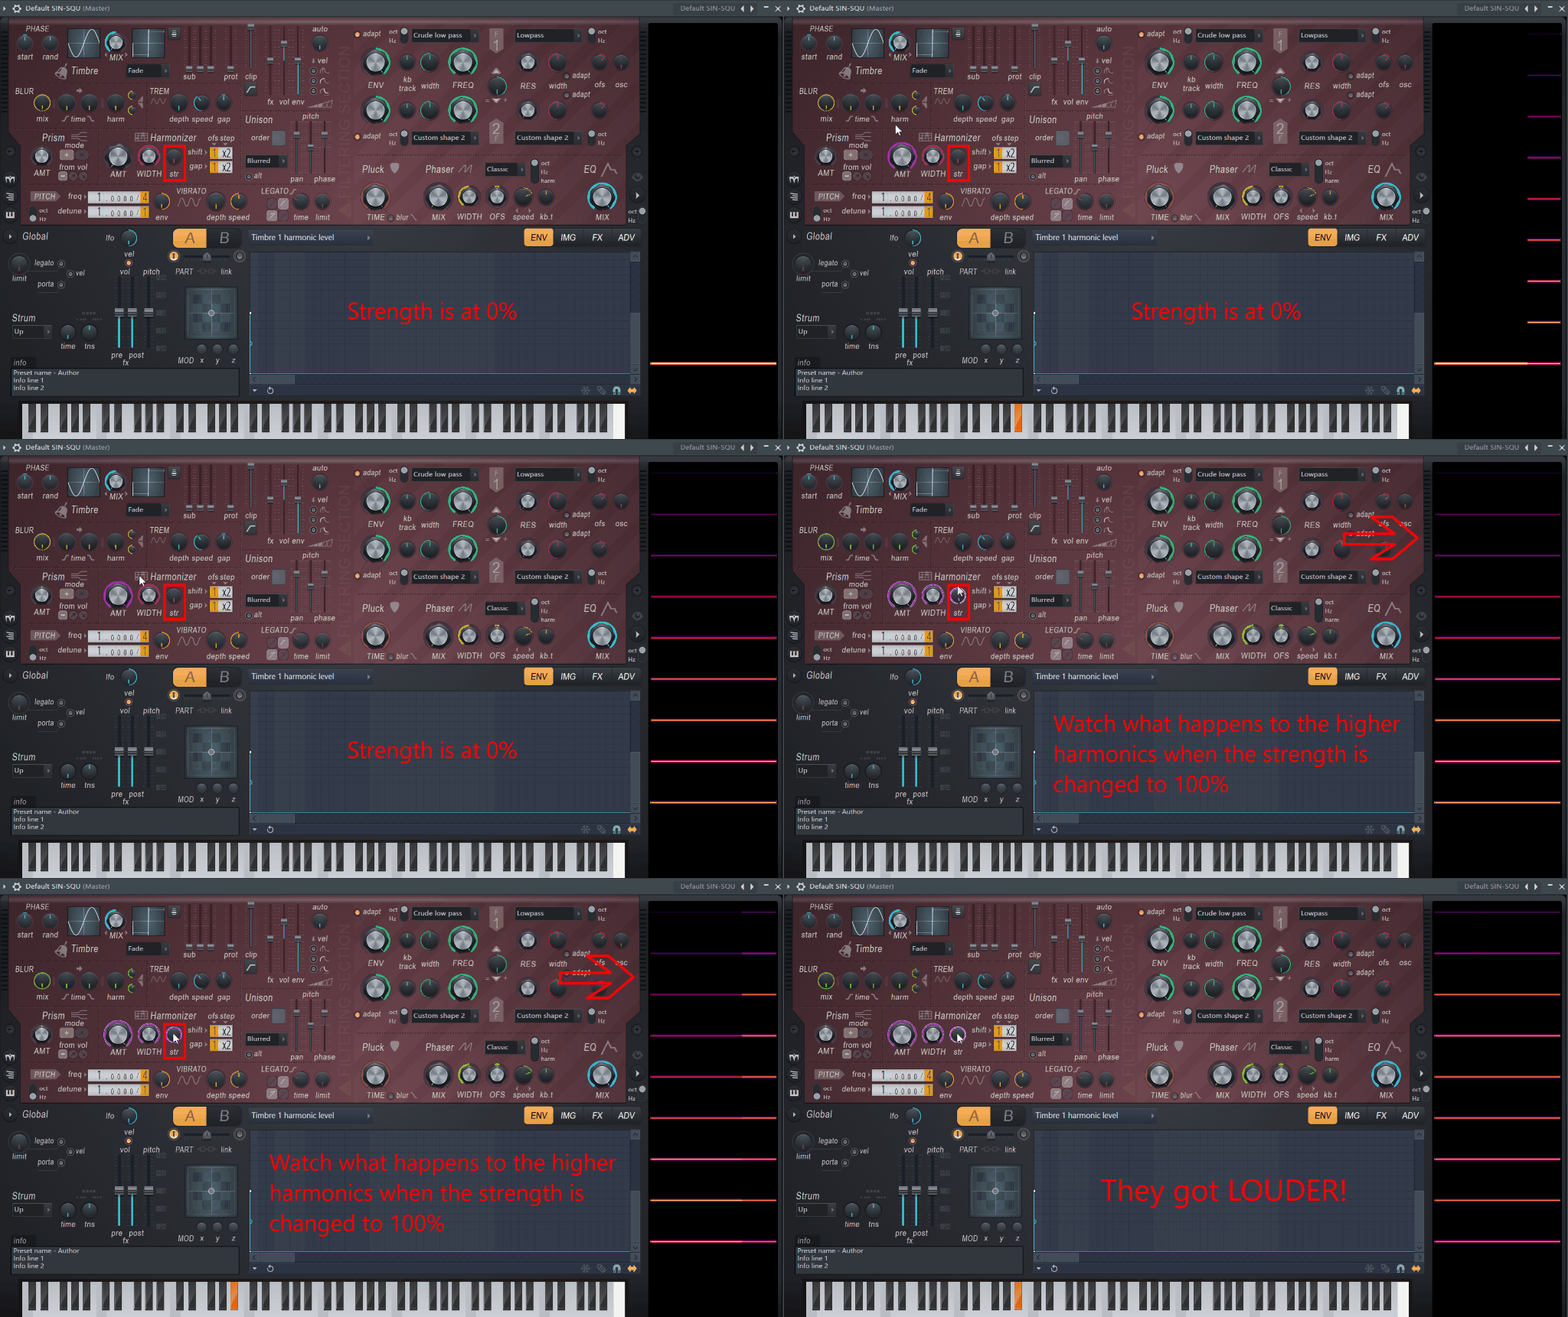
This is extremely helpful if you are trying to bring out the presence of the harmonizer in a sound, or in getting the higher frequencies of a sound to cut through your mix.
4. All About the Shift Function: Understand the Matrix!
And this is where people run into trouble. Even the most experienced Harmor users get confused by the harmonizer matrix and the shift function.
Now this is important. Too often people will just right click on the harmonizer matrix and randomize it without even knowing what it does. DO NOT DO THIS ever!
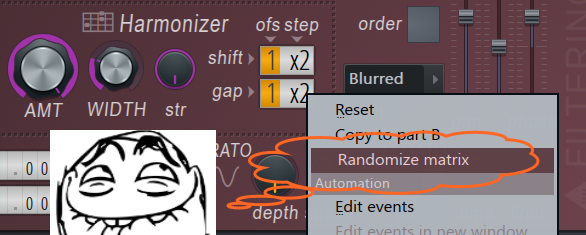
Instead, actually understand the power and uses of the matrix.
Let me walk you through the matrix step by step. We’ll start with the shift function.
What exactly does the harmonizer’s shift function do? Essentially, it shifts the pitch of the harmonic clones. It is powerfully capable of doing this several different ways.
The first way is the offset (ofs) box. The harmonic shift offset changes the pitch of the harmonic clones by octave-related intervals. Below is a chart showing the relationship between the offset number and the pitch that the first harmonic clone of the fundamental will be found at.
| ofs | The pitch of the first harmonic clone |
| 1 | +12 semitones (1 octave) above the original harmonic |
| 2 | +19 semitones above the original harmonic |
| 3 | +24 semitones above the original harmonic |
| 3 | +31 semitones above the original harmonic |
The second way is the step box. The step function determines the offset of the harmonic clones by either a multiplied value or an additive value.
Drag up on the box for additive harmonics to be produced, and down on the box for multiplied harmonics to be produced.
The exact formula determining how the shift function works is complicated:
If the shift step is in "+" mode, the nth clone will be at:
  ([shift offset] + 1 + [shift step] × n)th partial.
If the shift step is in "×" mode, the nth clone will be at:
  ([shift offset] - 1 + [shift step] ^ n)th partial.
Ewwww! I hate math. But understanding how the matrix works will pay rewards in dividends.
5. The Ins and Outs of the Gap Function
The last part of the harmonizer matrix is the gap function.
And the best part is that the gap function works identically to the shift function. The only difference is that it works on higher harmonics.
So when do you use the gap function? When you want to create harmonic clones of anything besides your sound’s fundamental. The shift function creates clones of the fundamental, while the gap function creates clones of everything else.
For this reason, the gap function will do literally nothing to a sine wave. Because a sine wave only has a fundamental and has no higher harmonics the gap function won’t affect it.
Below is the algorithm for how the gap function works.
If the gap step is in "+" mode, the nth clone will be at:
  ([gap offset] + 1 + [gap step] × n)th partial.
If the gap step is in "×" mode, the nth clone will be at:
  ([gap offset] - 1 + [gap step] ^ n)th partial.
3 Dirty Little Harmonizer Tricks
1. Use this badass program that was custom made to help you with Harmor’s harmonizer matrix.
The user dodecapoint created this awesome application and uploaded it to the FL Studio web forum.
It’s “a quick little utility app that computes the cloned harmonic frequencies. It’s helpful if you want to experiment with a particular sequence of harmonics and can’t figure out how to set the selector knobs. It’s a Mathematica CDF document, so you’ll need the free Wolfram CDF Player app to open and run it.”
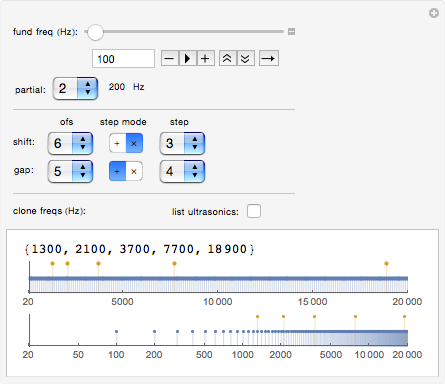
This application is great fun to play with and totally worth checking out! Click here to download it.
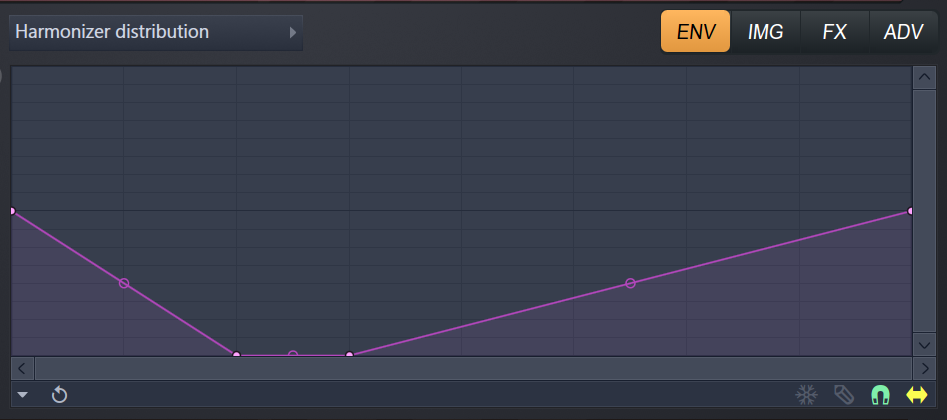
2. Use the Harmonizer Distribution tab
By using the harmonizer distribution tab, you can isolate specific harmonic clones and either get rid of them or boost them. This is a great way to remove problem frequencies, or create interesting harmonic intervals.
3. Sweep with the Width knob.
NEVER FORGET to use the width knob! It is perhaps to most valuable tool inside of the harmonizer.
Sometimes it might seem like the harmonization matrix is off, but really, you just need to turn down the width knob.
Here’s how it works. Turn the width knob all of the way to 100%, then slowly bring it back down until it hits the “sweet spot.” This is the best way to explore the sound of a harmonization matrix setting! It also works well with the harmonizer’s default settings.
How to Make Two Freakin’ Awesome Presets With the Harmonizer
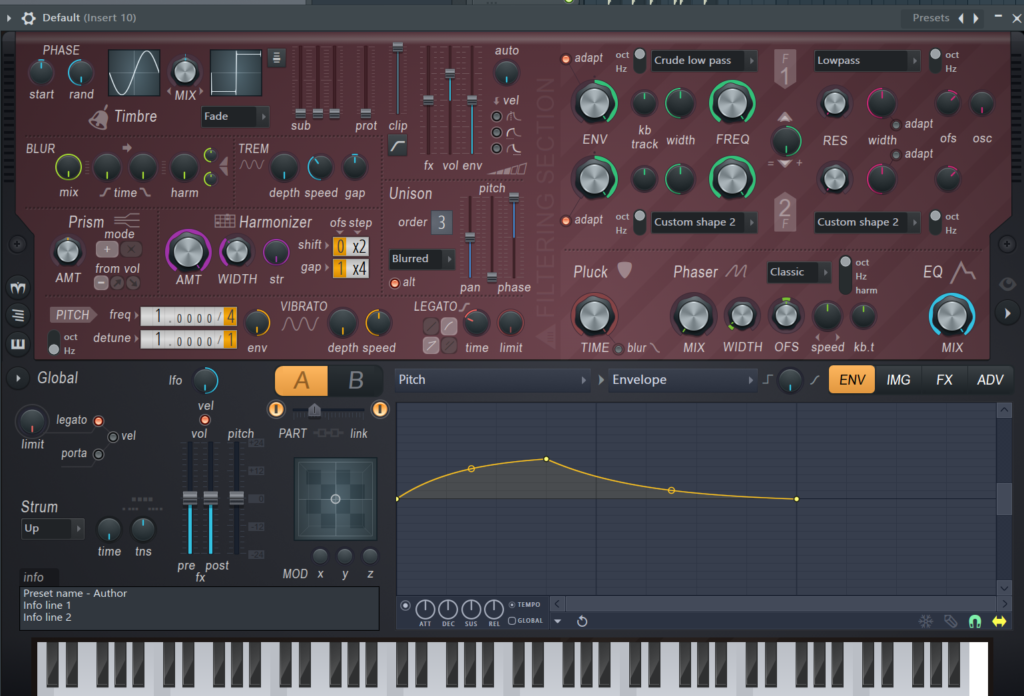
How to make Liquid Stranger’s gnarly harmonized dubstep growl
In the Youtube video above, you can hear Liquid Stranger use a nasty dubstep growl that is vaguely reminiscent of an organ. Let’s make that growl!
First open up a new Harmor patch, and change the saw wave to a sine wave. Turn the mix knob half way between the sine and square waves.
Next, change the pitch down two octaves and change the unison to 3 voices with no pitch spread. Turn the phase randomization knob all the way to the left. Open the pitch envelope window, and synchronize the pitch to the tempo of the song. Draw the shape seen in the picture below (the pitch goes up five semitones, then slides back down to the root note). Finally, in the Harmonizer section, turn the Harmonizer AMT all the way up, change the shift offset to 0, and the gap step to x4. Turn the width down a small amount.
The final step is to go to the effects tab and add a chorus effect along with heavy compression. Also, duplicate part A to part B and change the pitch of part B up an octave. And poof! You should have something like the sound below. The patch is pictured.
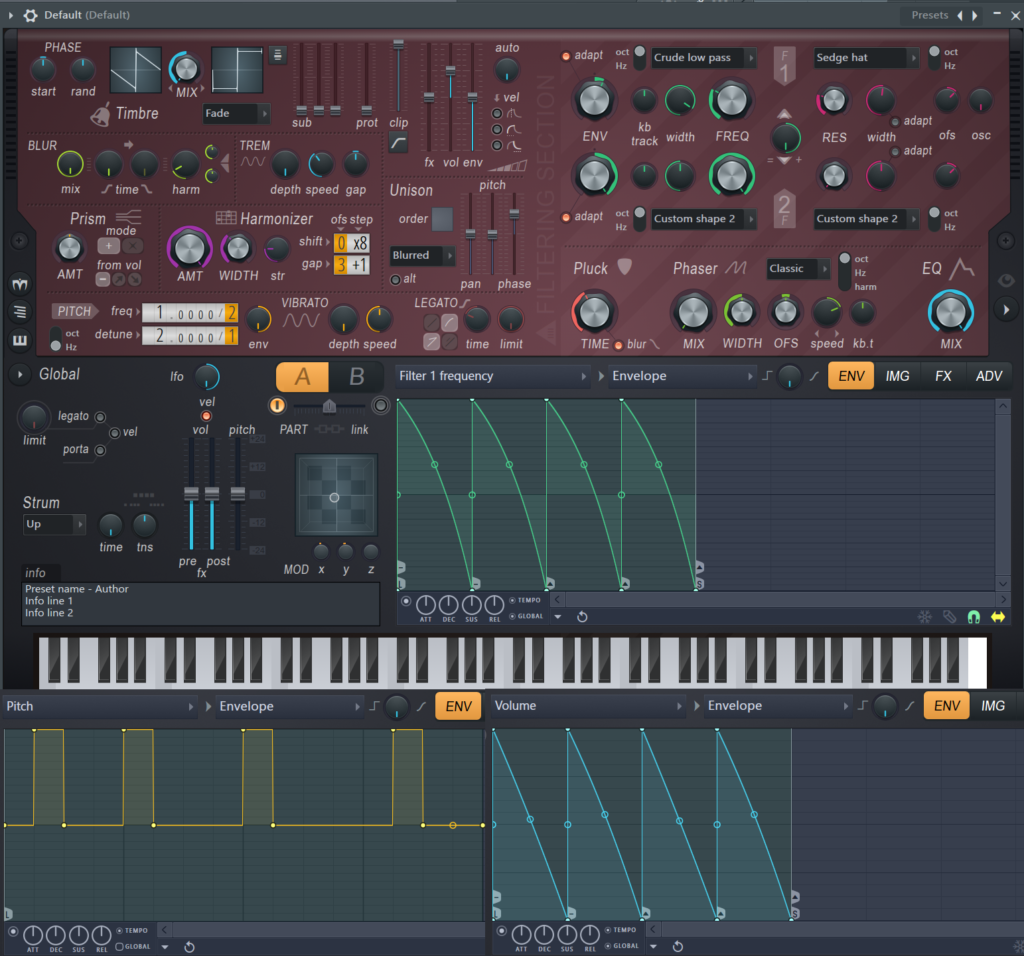
How to make a beautiful pluck / arpeggiated sequence with the harmonizer
Below is a picture of all of the parts of this patch. You can use it to reconstruct it. Just add some reverb and delay to it, and it will sound great! Enjoy!
Now, one more important thing before you go…
Are you tired of using the same sound effects and presets as everybody else?
The solution is simple. Did you know that you can get sounds and presets custom made for less than $1 each? Well now you can! I do custom preset design and am accepting new clients.
Let me design your sounds how you want them! I start at $9.95/mo. (you’ll get new, custom-made, exclusive designer presets every month for a very good price). Click here to find out more.

Like!! Great article post.Really thank you! Really Cool.
Bro, this is clearly the best article, not just about Harmonizer, but harmor in particular. Quick question though, I cam across some post about Harmor on https://www.annmsmusic.com/ where they talk about the tonality of harmonizer, How can I achieve that?